Creating a Safe on a Web browser
Last updated: April 15, 2026
Create a Safe
A Safe takes just 60 seconds to set up and less than 20 seconds if you select an option to "Pay later" and avoid deploying on the spot. Here is a walkthrough to get started:
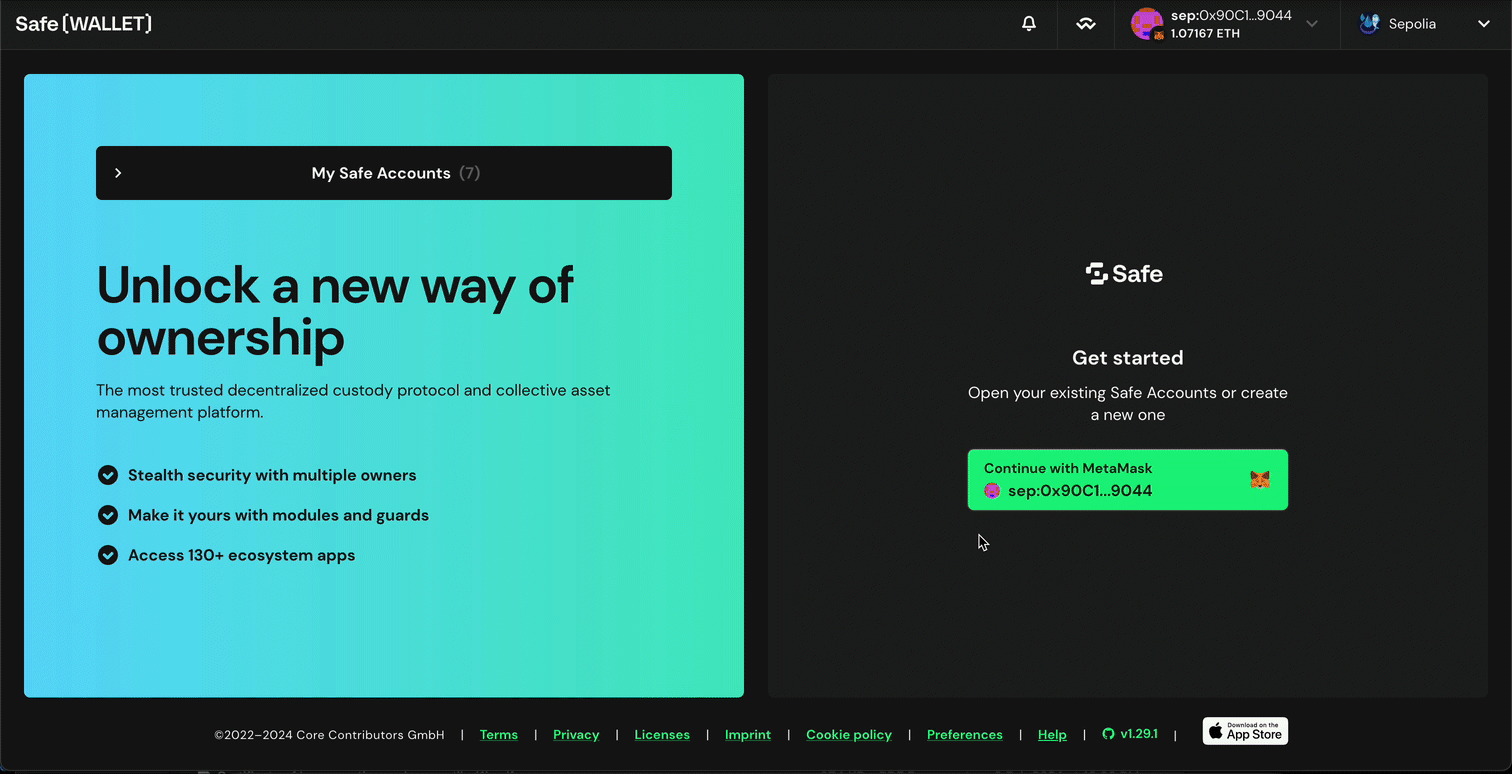
First, open the web app at https://app.safe.global/. We recommend using Google Chrome.
Connect a signer wallet
To start creating a Safe, you first have to connect a signer wallet (here's why). We support a wide range of signer wallets that can be chosen to interact with Safe.

Depending on the network, make sure you have some native assets such as ETH in the wallet, as the Safe deployment will cost some transaction fees.
Once a wallet is connected, you can start the process of setting up your Safe. Click to continue with the connected wallet. If you don't yet have any Safes you will be taken to the creation flow straight away.
If you already have some previously created Safes belonging to the connected wallet, you will see them listed. To proceed to the Safe creation, click on "Create new account" button.
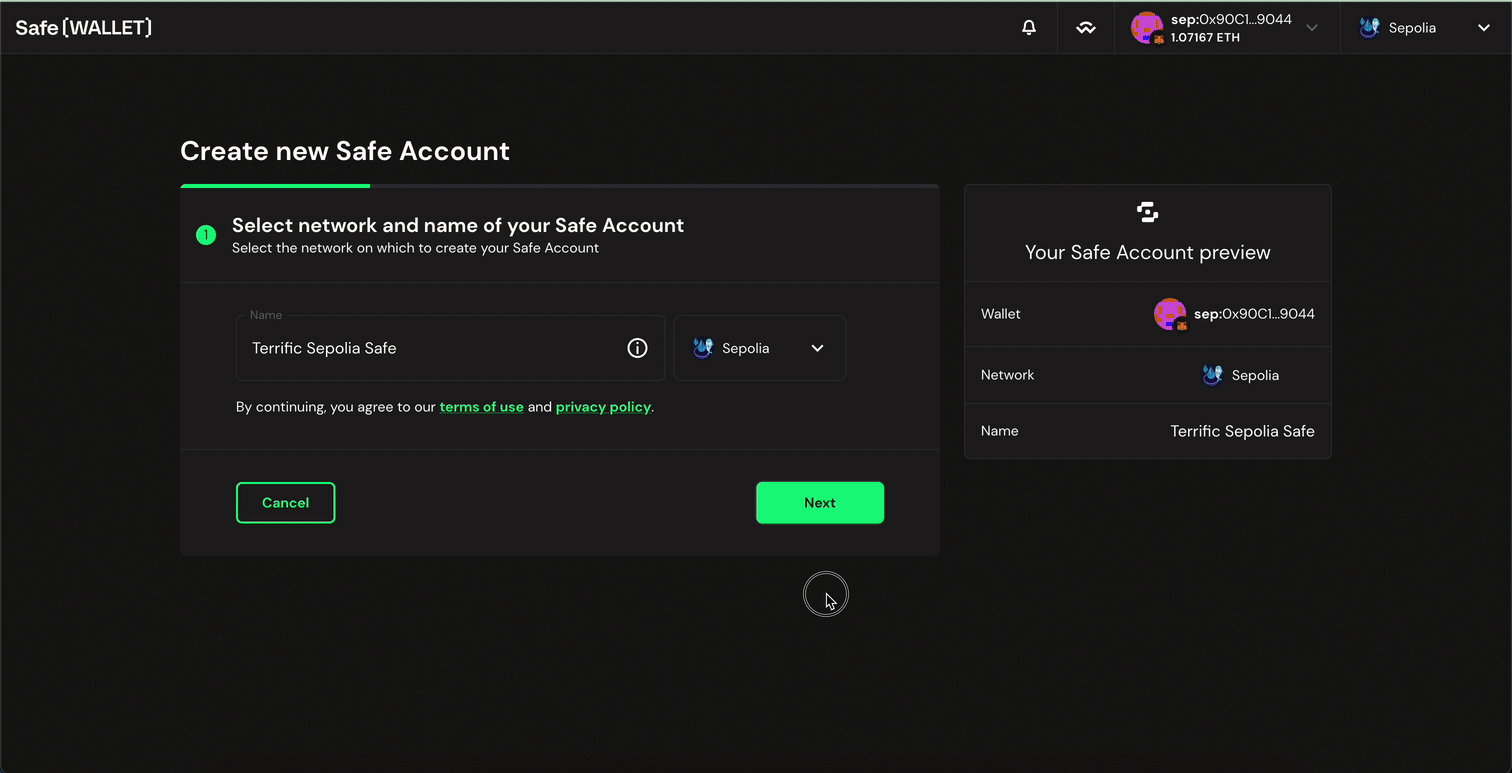
First, you'll need to give a name to your new Safe. This name is only stored locally on your computer and never shared with any third party. If you prefer not to name the Safe on the spot, we have a pre-populated randomly generated one that you will be able to edit afterwards.
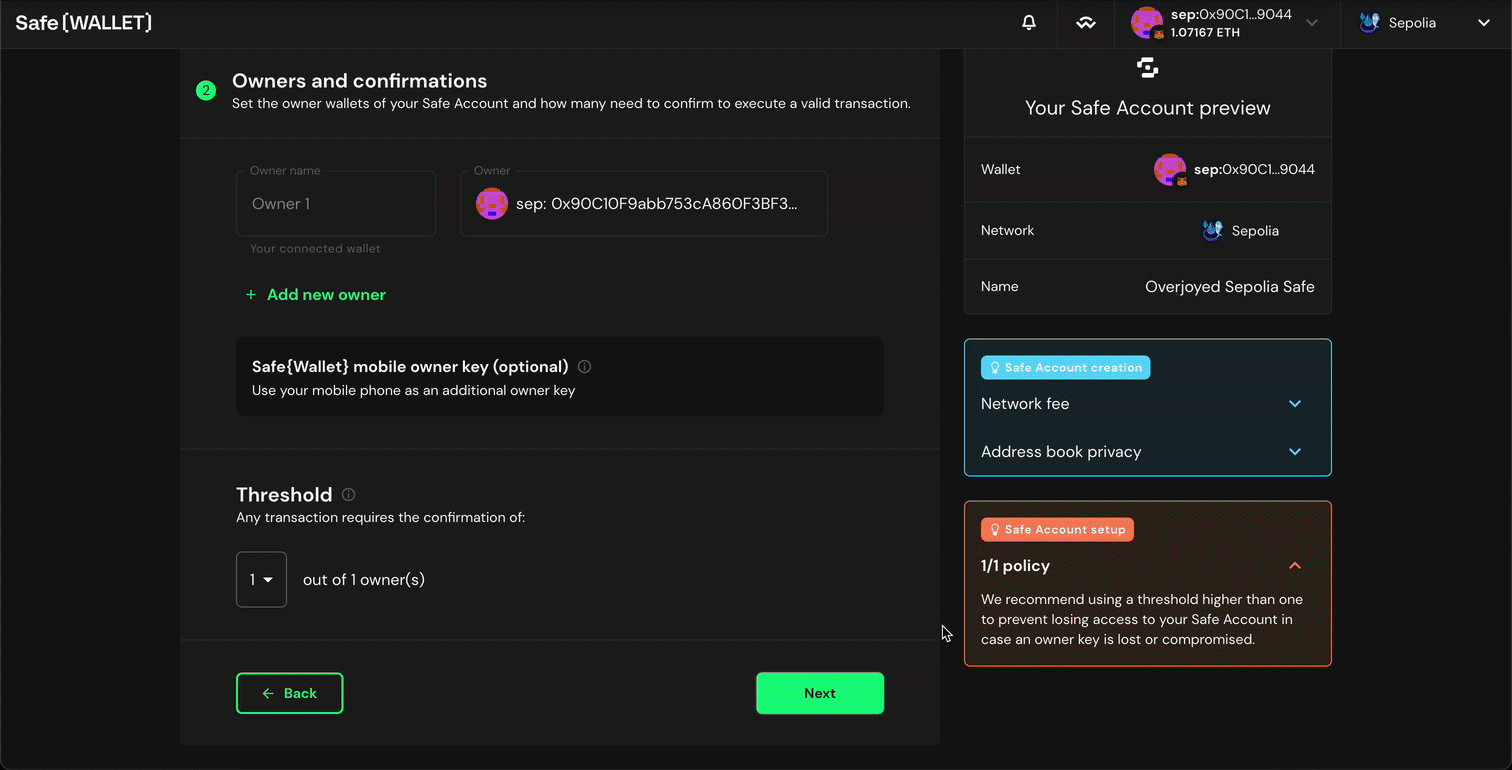
Select signers
This step is important as the signers are the addresses that have permission to submit and approve transactions (you can later remove or replace these addresses).
Your connected signer wallet is already added as a suggestion for the first signer, but you can change it as well. Add as many signers as you want, either by pasting an Ethereum address or by entering an ENS name.
Keep in mind that if you wish to create a Safe without the gas costs, you'll have to proceed with single signer setup. Multisignature Safes can't be created gaslessly for now.
Please refer to this article for more information on which Safe setup to use, i.e. which signer wallets, how many signer wallets and what threshold.
Define confirmation threshold
The last step is selecting how many signer confirmations a transaction or any settings change of your Safe requires before it is approved. Make sure to consider your setup carefully. If you do not have access to enough signers to reach the threshold, you won't be able to recover your assets.
Review and complete Safe creation
You'll have 2 options - either to deploy the Safe right away (Pay now) or proceed with gasless creation (Pay later). In the former case you'll have to sign a transaction with your connected wallet and end up with a fully-fledged Safe deployed to blockchain. In the latter case you'll have to deploy it with a first transaction but being able to explore Safe without paying anything to the network validators.
Deployment, takes 20-40 seconds, depending on the network conditions. Note that sponsored transactions seen on the GIF example are only available for Sepolia Testnet and Gnosis Chain.

Gasless creation, almost instant.